
Building a Composter

Trash Can Composter
If you do a lot of gardening, you know how valuable compost can be towards enriching the soil and improving plants. Rich in organic material, compost acts as a soil conditioner and nutrient source, and also contains beneficial microbes that assist in making those nutrients more readily available to your plants.
Commercially-available compost making units seemed rather costly to me, so I decided to build a one out of an old trash can. Holes had been worn in the bottom of the can over nearly two decades of use, but I figured it could continue to be of service in a different way.
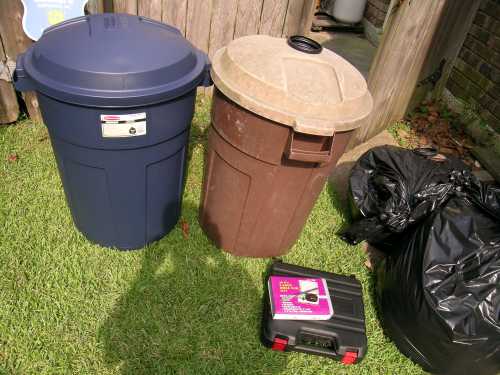
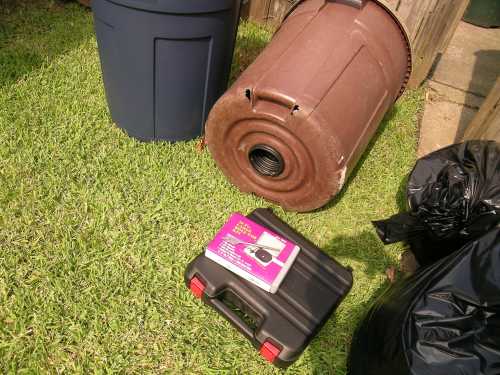
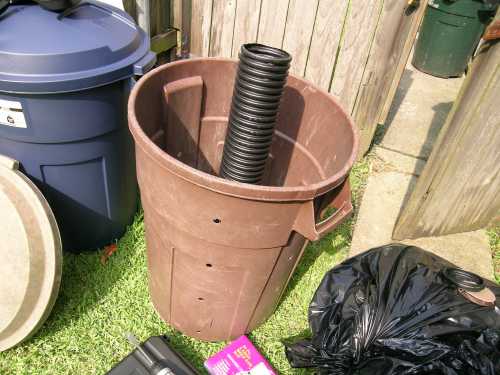
All the necessary materials: One old 32-gallon RubberMaid trash can with lid, and a length of 4" diameter corrugated, perforated plastic drainage pipe (available from most home improvement centers).
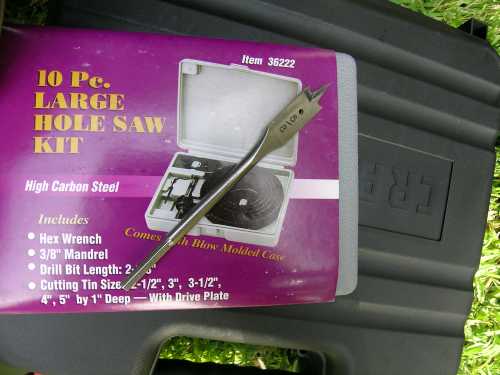
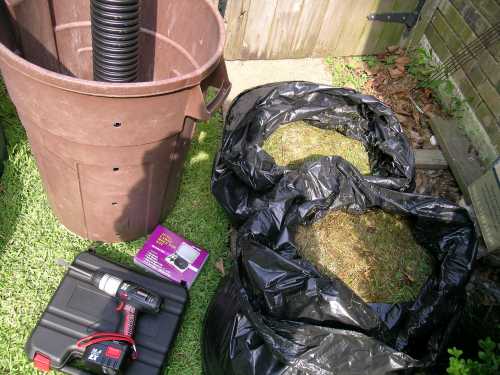
Necessary tools for the project include a cordless drill, a 4" hole saw, a 5/8" wood bit (the kind with points at the outer edges), and a pair of heavy kitchen shears.
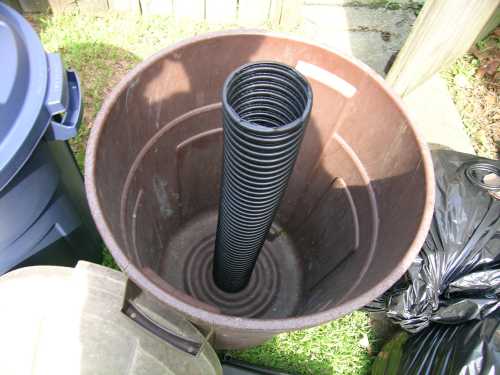
A length of the pipe was cut 33" long, to the next nearest widest corrugation at each end. Rough edges were cleaned up, but the kitchen shears do a reasonably neat job, anyway. The flanged ends were cut perpendicularly 1/2" deep at the 12, 3, 6, and 9 o'clock positions. 4" holes were sawed in the bottom center of the can and center of the lid-- it was easiest to center the holes by drilling from the inside surfaces in both cases. Since the pipe is 4" in diameter at the narrowest point of the corrugations, the cuts made in the ends were necessary to pass the ends through the 4" holes, but then "lock" the pipe in place. This task was more difficult at the bottom end, as the can is thicker and less pliable than the lid, but the tightest fit possible is preferable.
5/8" holes were then drilled in a regular fashion all around the can-- 24 all total. 4 additional holes were drilled in the lid as well.
Conveniently, the yard man chose not to use the mulching mower this particular week. Lots of starter grass clippings, leaves, pine needles. Kitchen waste and shredded paper will be added also.
Total project cost: an amazingly low $3.48! Actually, only $1.16, as there is enough pipe left over from the 10 ft. length to make two more. If you wanted to make one out of a brand new can: $13.08.
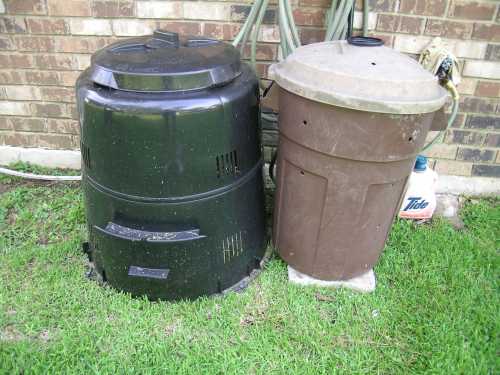
Funny part of the story: As I was completing the project, my neighbor came out to wash his car and asked what I was doing. When I told him I was making a composter, he said he had one he didn't use and I was welcome to have it-- for free. Turns out it's an Earth Machine, which the local municipality gave out free to residents several years ago in an effort to reduce landfill waste. Seems they normally sell for about $60-70. They appear to be nothing more, really, than an eye-pleasing way to make a compost pile, but include venting, an adjustable-vented lid, and a door to remove compost. It may well not work any better than my can project, but, for free, I'll give both a try. I can see already, however, that my design has one advantage-- all I will need do to give the pile a stir with mine is lay it on its side and roll it around the yard a bit. Between the lid's built-in clips and the chimney flange holding it, the lid should, hopefully, stay firmly in place. The good news is that the compost that was left in the bottom of the Earth Machine will make a fine inoculant for both compost piles.
| Any purchases you make from Amazon can help support this web resource. Click to find out how. | ||
|
|
||


|
This site is a participant in the Amazon Services LLC Associates Program, an affiliate advertising program designed to provide a means for sites to earn advertising fees by advertising and linking to Amazon.com or its affiliates. |